How to make a beautiful paper hydrangea table lamp
How to make a beautiful paper hydrangea table lamp
Yara Lin

Hi, I’m Yara Lin, an art and travel enthusiast and the founder of PaperGirlDIY. I find joy in transforming paper into beautiful creations and strive to combine my craft with eco-friendly practices. I’m passionate about sharing this journey with others.
Paper Art Hydrangea Table Lamp: Carving a Room of Gentle Light
A hand-made lamp can always inject a unique warmth and creativity into the home space. Today, we will carefully follow the steps below to transform the light water drop paper into an elegant paper art hydrangea table lamp, allowing the art of fingertips to light up every corner of life.
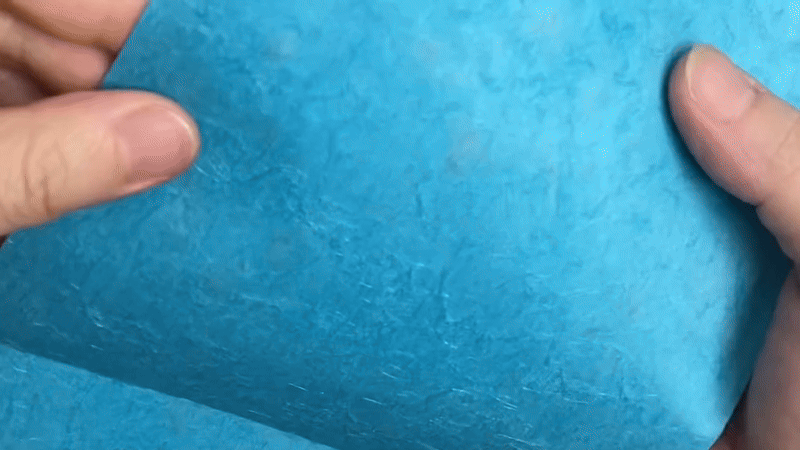
Step 1: Lay Flat, Embracing Creative Beginnings
First, lay the waterdrop paper flat on your work surface, ensuring the smooth side faces up. This will provide the best texture for the subsequent creation of the petals.
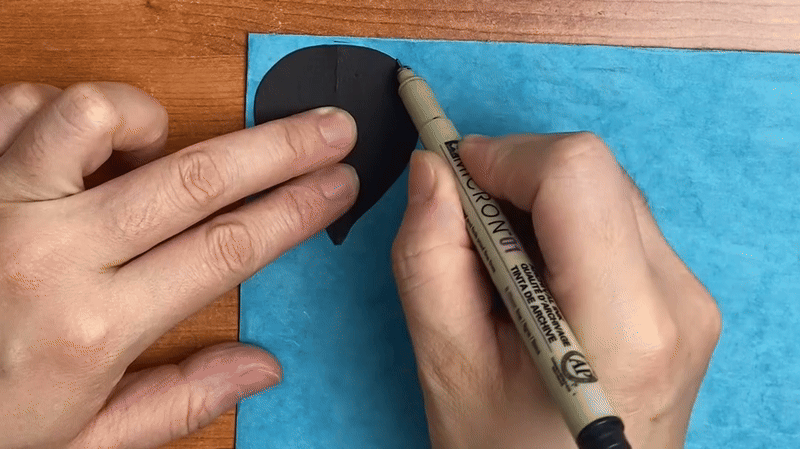
Step 2: Template Guidance, Outlining Floral Contours
Take out the pre-prepared petal template and place it steadily on the waterdrop paper. Use a pen to carefully trace the shape of the petals along the template’s edges. Depending on the size of your paper, you can trace multiple petals at once to speed up the cutting process.
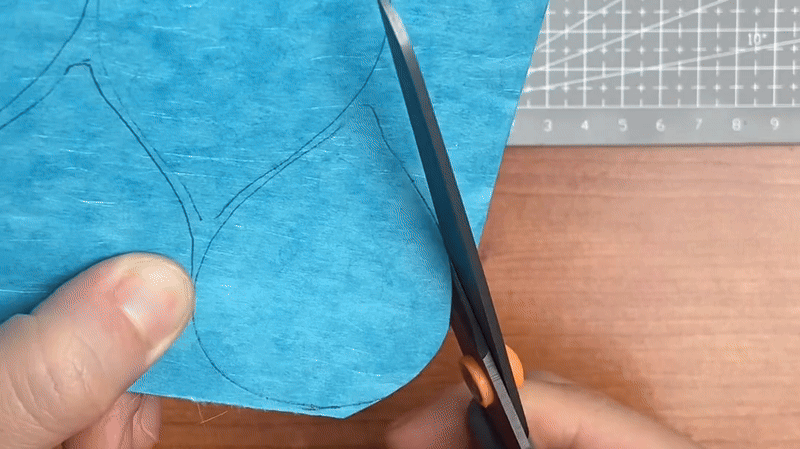
Step 3: Delicate Cutting, Giving Life to Petal Forms,Quantity Matters, Building the Foundation of Lush Blooms
Pick up your scissors and carefully cut out each petal along the traced lines. Repeat this step until you have obtained the 200 petals needed to create a full hydrangea lamp.
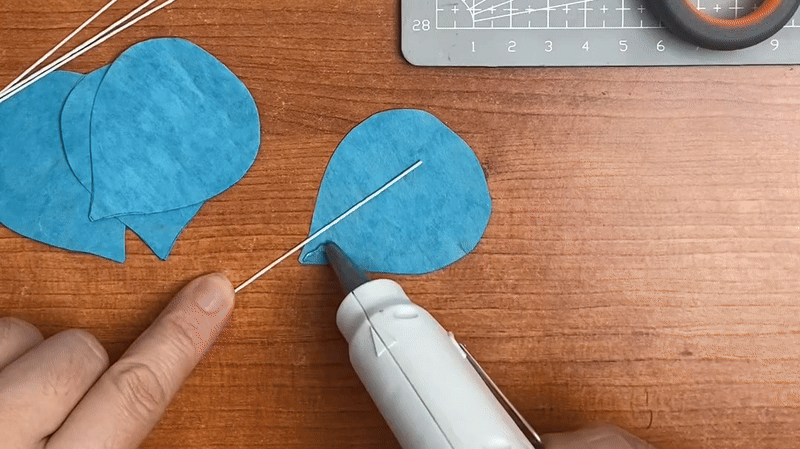
Step 4: Smooth Side Up, Unifying Visual Presentation,Wire as Stem, Hot Glue Connecting Petals
Place all the cut petals with their smooth sides facing up, ensuring consistency in texture and sheen during the subsequent assembly process.Take out the 22-gauge wire, which will serve as the “stem” supporting each petal. Using a hot glue gun, carefully fix one end of each petal securely to the wire. You can do this in batches until all 200 petals are connected to the wire.
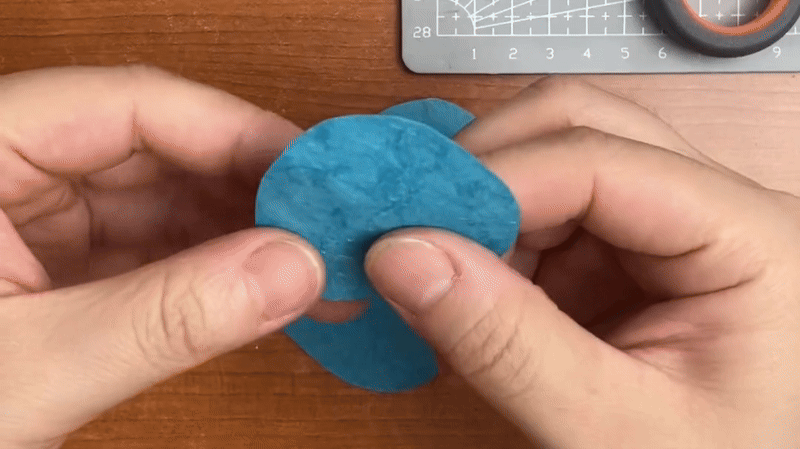
Step 5: Gentle Folding, Adding Three-Dimensionality to Petals
Once all the petals are attached to the wire, gently fold each petal to create a natural curve, adding a lively three-dimensional effect to the final hydrangea.
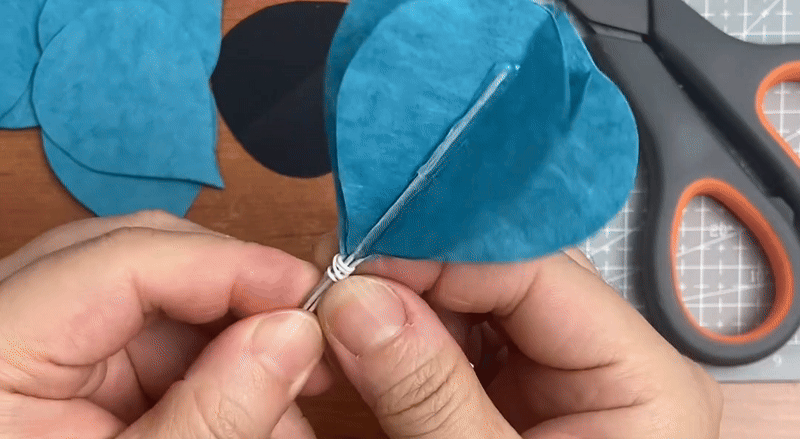
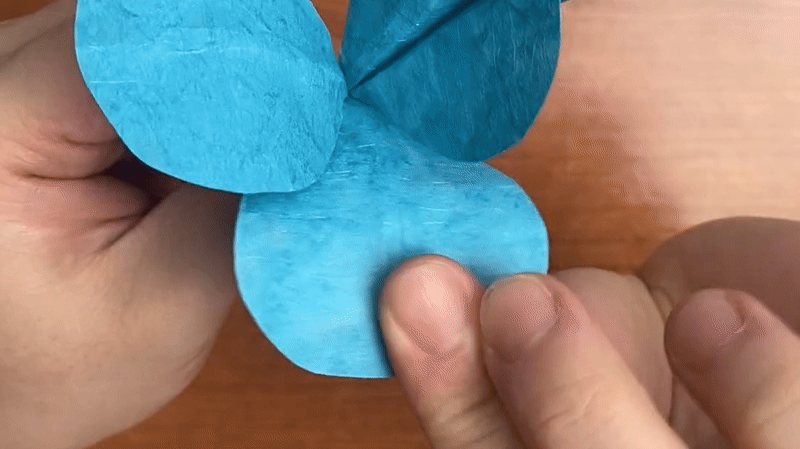
Step 6: Four Petals as a Group, Constructing the Flower’s Initial Form
Take four wired petals and place them with their concave and convex sides facing each other in pairs. Then, use the hot glue gun to fix the wired parts together, forming the basic structure of a small flower.
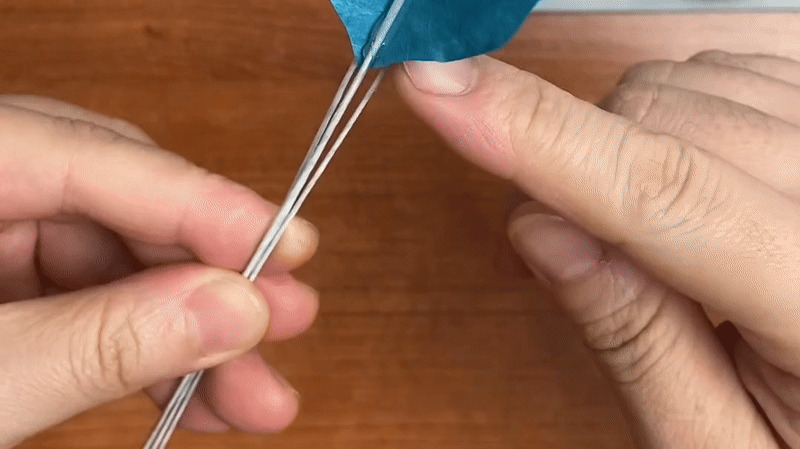
Step 7: Thin Wire Wrapping, Reinforcing the Flower Base
To make the base of the flower more stable, take the thinnest wire and wrap it around and fix it to the bottom where the petals connect to the thicker wire, enhancing its sturdiness.
Step 8: Shaping One by One, Blooming into Diverse Forms
Now is the time to showcase your artistic ingenuity. Shape each petal according to your vision, whether budding or slightly unfurling. By patiently adjusting the curvature and orientation of each petal, a unique paper flower is created. We need to repeat this process to make a total of 50 beautiful flowers.
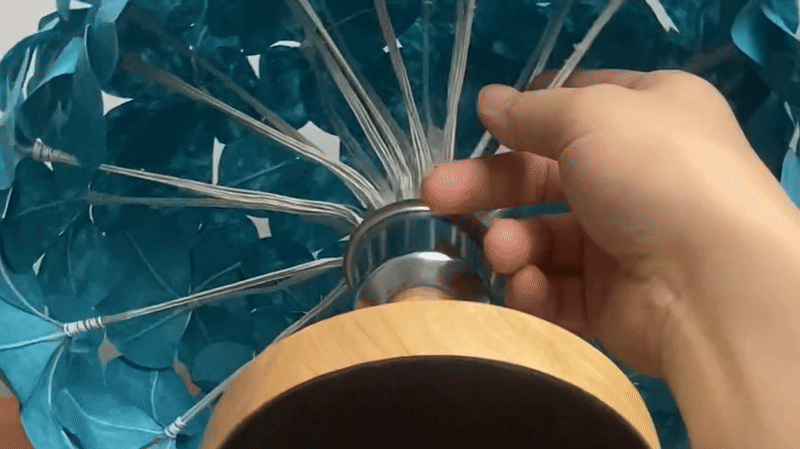
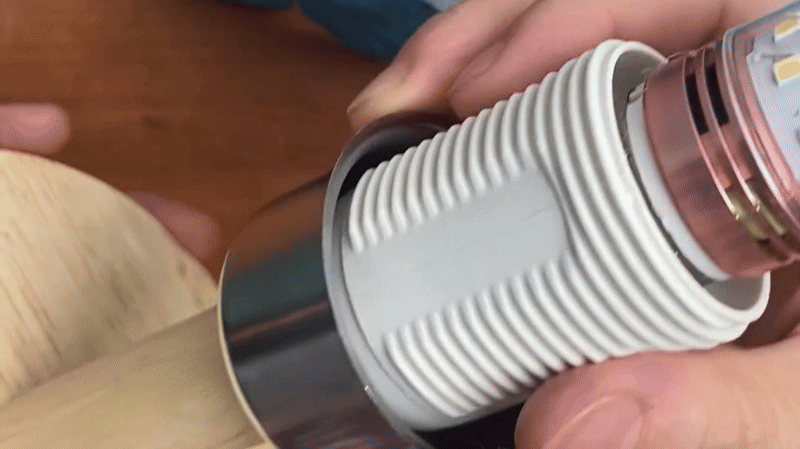
Step 9: Disassembling the Lamp Holder, Preparing Installation Space
Take out the lamp holder. First, gently unscrew the lamp holder head, then carefully open the base, extend the wire appropriately, and finally unscrew the lamp holder head completely to create enough operating space for attaching the flowers.
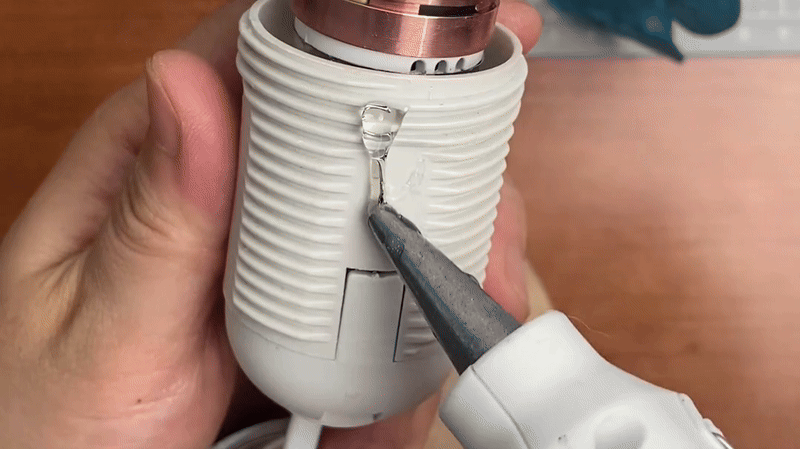
Step 10: Hot Glue Fixing, Initially Forming the Hydrangea Outline
Using the hot glue gun, carefully fix the wire at the bottom of each prepared flower onto the lamp holder. This requires patience and precision to ensure each flower is securely attached to the lamp holder’s surface.
Step 11: Layered Fixing, Sculpting a Full Bloom
When fixing the flowers, be sure to follow the principle of layered fixing. Start from the top of the lamp holder and fix the flowers layer by layer downwards. At the same time, pay attention to adjusting the curvature of the flower wires, gradually increasing it as the layers go down, to create the round and full shape of a hydrangea.

Step 12: Trimming and Tidying, Restoring the Lamp Holder’s Original Look
Once all the flowers are securely attached to the lamp holder, carefully trim any excess wire extending beyond the bottom of the lamp holder to ensure overall aesthetics and safety. Then, screw the lamp holder head back onto the base, restoring the lamp holder’s complete structure.
Step 13: Overall Adjustment, Illuminating Brilliant Colors
The final step, which breathes life into this lamp, is to readjust the overall shape of the hydrangea lamp. By meticulously adjusting the position, angle, and orientation of each flower, achieve the most natural and vibrant appearance. A unique paper hydrangea lamp, handcrafted by you, is now complete, waiting for the night to fall and illuminate the space with its one-of-a-kind gentle glow.